Well hey there! Gosh it's been a while, hasn't it? Here I am back again, with a sewing project from the spring to share with you all! Yes, from the spring. Good thing is though, that the yellow waxed cotton canvas Kelly Anorak I sewed up last spring also works PERFECTLY for the fall! It's a beautiful early fall day outside today and I was feeling inspired to finally share this make, so perfect timing to take some photos of this jacket I love so dearly.

[...]
This is the second Kelly Anorak I've made (first one was in a navy softshell in 2017), and this time I used the Lining Expansion-Pack to make a warmer jacket that would work well into the late fall and the early spring when I really don't need a full-on parka just yet.
The first one I made, I made a size 14. I usually fall in the 14/16 range for Closet Case patterns and my old one does still fit. But, because I was adding the lining to this one I went up to a size 16 just to be safe. I'm glad I did! It fits really well and there is still lots of room if I wear a chunky sweater underneath.
For the lining I used a lovely blue-stripe Essex Linen (can't remember where I bought it from now) and quilted on a layer of 100% cotton quilt batting to add that extra layer of warmth. It also helped from the stripes showing through the canvas, as the wax soaked into it made it quite see-through.

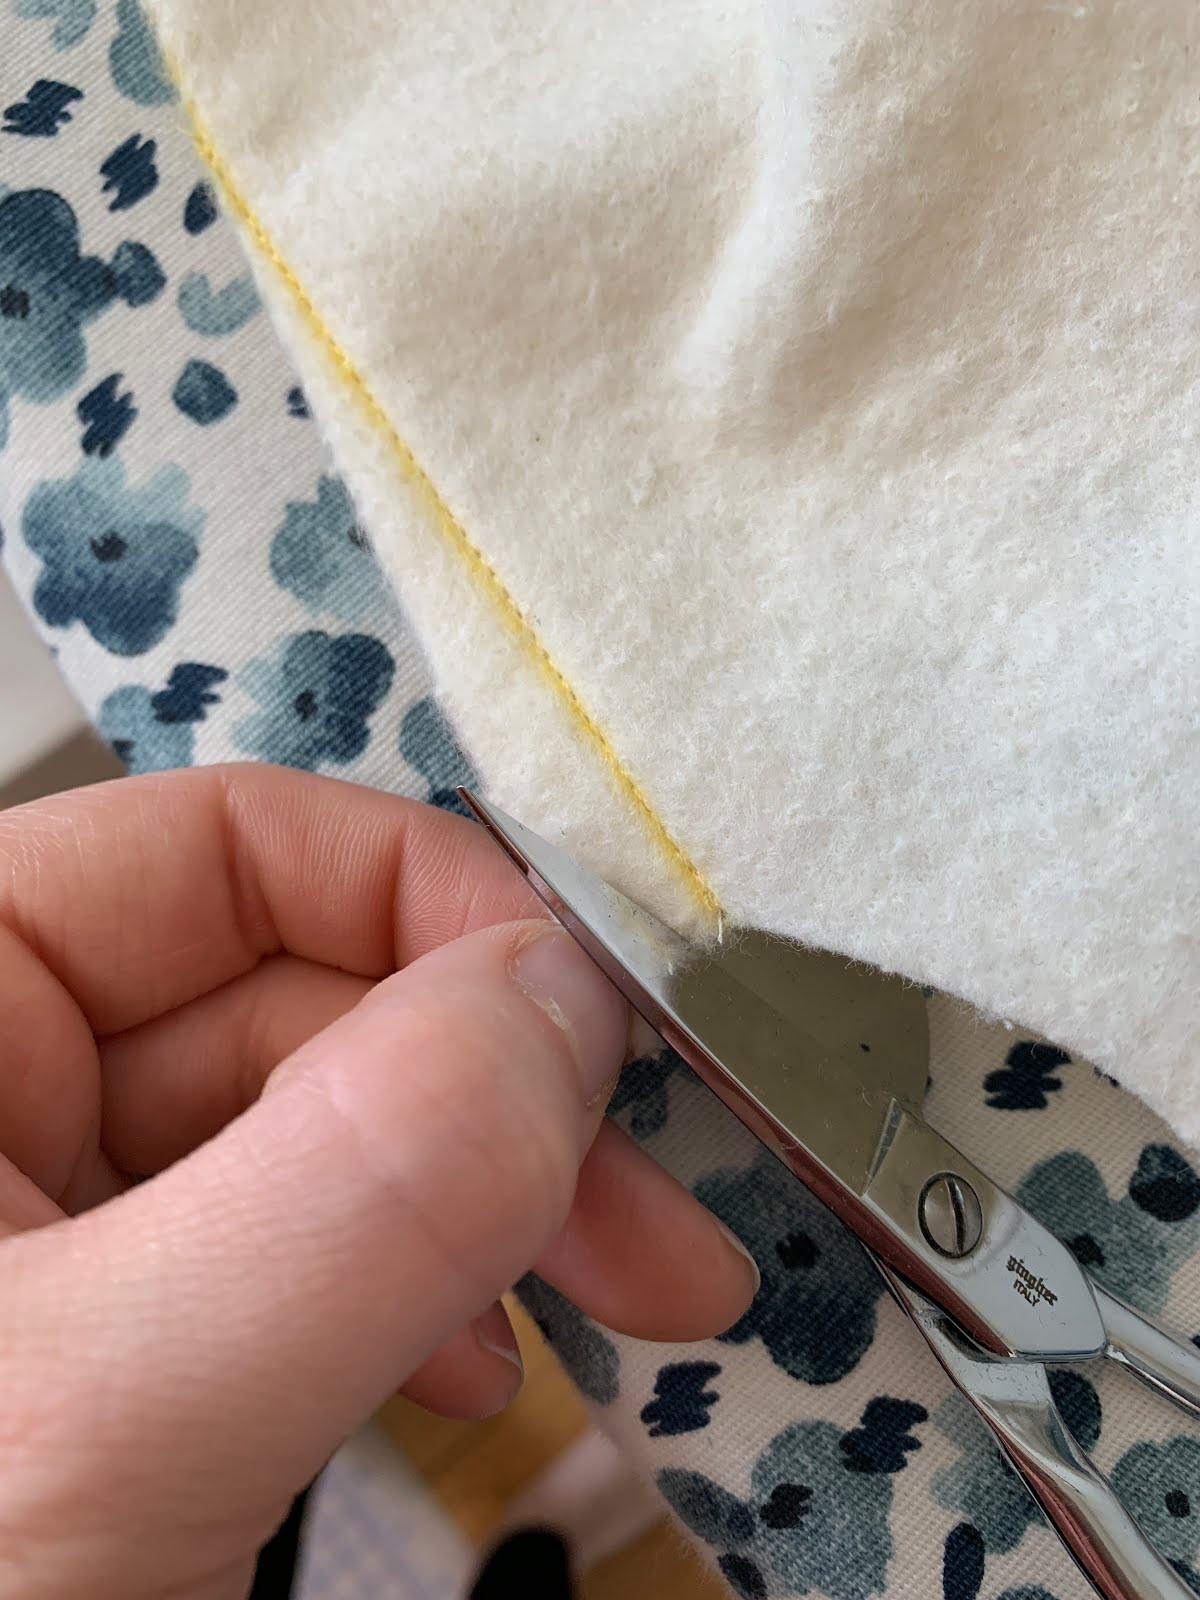

So to start I cut out all the lining pieces in both the linen and the batting. Following the tutorial posted on the Closet Case Blog for adding insulation to a jacket, I basted them together just inside the seam allowance, and then trimmed down using my handy-dandy duck-billed scissors. Once that was done I loosely quilted everything together in 2" strips.
And we're off cutting into the WCC! I wasn't too concerned about using pins, as I knew I could just pass over any pin marks with my hair dryer after I was done and the wax would just melt right back in.

Sewing this jacket together was TOUGH. It was big and heavy and difficult to manage... but the process was still so much fun. Much like my softshell... using an iron wasn't really an option so that sure made things go faster! Only difference was having to use sew-in interfacing because obviously the iron-on stuff wouldn't work on the WCC. The WCC also totally gummed up my machine and I went through a handful of needles. Everything needed a good wipe down with some rubbing alcohol to get the wax off before starting a new project.
I bought the Kelly Anorak Hardware Kit during a Boxing Day sale (I think?) but didn't like the black zipper or drawstring. Managed to find the perfect white plastic zipper and white drawstring and I really love the contrast with the yellow.
ANYWAYS - enough about the process, here's photos of the finished product. Well worn and well loved at this point. I'm hopeful with good care and re-waxing here and there, this jacket will last me for many many years into the future.


For the waist draw-string casing, I didn't really follow the instructions as written. Because this fabric was so fussy, I didn't want to deal with sewing through all the layers and trying to get the cord through. So instead I just top-stitched it down on the outside and threaded the drawstring through between just the casing and the outside of the jacket.


No comments:
Post a Comment